
Better than the best vinegar pickles, these wild fermented cucumber pickles are raw and never heated which helps maintain their satisfying crunch. A living, raw food loaded with probiotics and fresh taste. Wild fermentation is a wonderful way to preserve fresh vegetables. These pickles will last for a year or more in cold storage.
Are you new to fermentation and want to dive in head first and learn how and why to ferment any vegetable? Do you want a better understanding of food safety and how to preserve food to last? If you are a free-minded person that wants to do more for yourself and rely less on the system consider joining Lanni of Greener Postures for the GETTING STARTED WITH FERMENTATION FOR FOOD PRESERVATION online workshop. This workshop is live and interactive on zoom. To see a full list of dates all Greener Postures online workshops CLICK HERE.
Disclosure: The links below are affiliate links. This means that, at zero cost to you, I will earn an affiliate commission if you click through the link and finalize a purchase. If you’re already going to buy something from Amazon, this a great way to do so and also support Greener Postures and the Preserving Today Channel. Thank you.

How I Make
Fermented Dill Pickles
Equipment
- Vessel*
- Weight*
- Lid/Cover*
Ingredients
- Fresh Cucumbers
- Pickling Spice
- Real Salt
- Water**
- Fresh Grape Leaf***
- Garlic
- Fresh Dill (optional but great)
- Chili Flakes (optional)
Method
- I gently smash and peel the garlic cloves. I use as much as I feel like. I really like garlic and used a whole bulb for this half gallon jar, but I never measure.
- I put few garlic cloves in the bottom of the vessel along with the pickling spice. I use 1 Tablespoon pickling spice per quart.
- I add some fresh dill when I have it. When I want spicier pickles I add some extra chili flakes.
- I place a grape leaf*** on the top of the spices.
- I pile in some whole pickling cumbers OR I use sliced cucumbers when making sliced pickles.
- I throw in some more garlic cloves and dill when layering in the cucumbers.
- I mix the brine – 1 Tablespoon of salt per 2 cups of water.
- I cover the cucumbers with brine and add another grape leaf*** on top.
- I place the weight on top of that leaf to keep everything submerged under the brine. This time I used the Ball Fermentation Lid and Spring Set.
- I add the lid from the fermentation set, but you could use a coffee filter or towel secured with a rubber band.
- I labeled the jar with the date and time.
- I will ferment these on the counter or shelf at room temp for 3-7 days****. I’ll start tasting at 3 or 4 days. They’re done when they taste good.
- I will move them to cold storage (my fridge) with a regular lid when they taste sour enough but are still crisp.
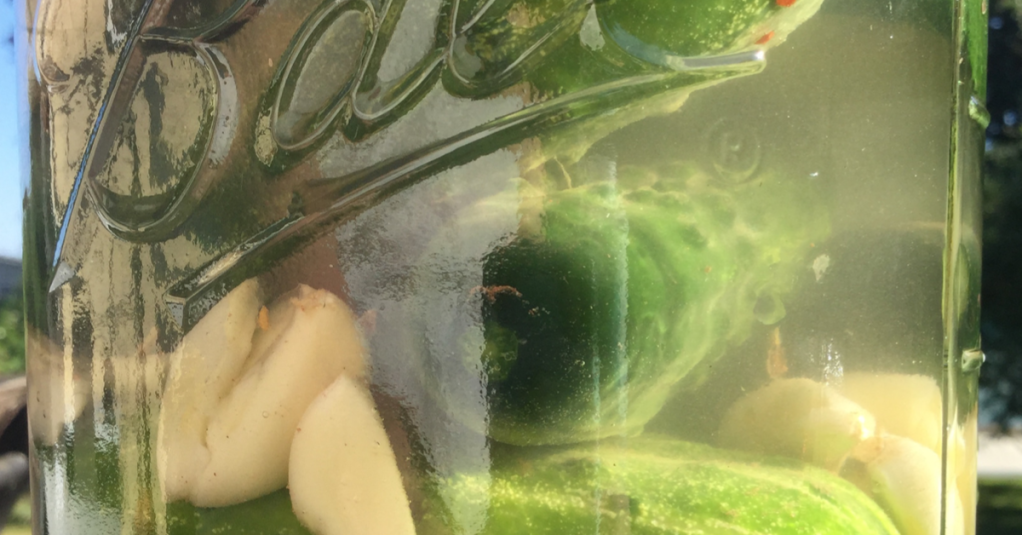
*A vessel can be a canning jar or crock. Really any glass or ceramic vessel big enough to hold everything and leave 1 or 2 inches of headspace. In this photo I am using a Half Gallon Ball Canning Jar.
*Use any weight that will keep the veggies submerged under the brine. A rock, a bag of pebbles, or buy one of these awesome Ball Lid and Spring Fermentation Sets that I use anytime I’m fermenting in a canning jar. They fit with any wide mouth canning jar and they’re cheap.
*The lid/cover should cover the vessel but allow gasses to escape. I often use a coffee filter or towel and a rubber band, unless I’m using the Ball lid and spring set, those come with a lid with a handy little vent.
**Use good water. If you live in a city where the water source is chlorinated, you can use distilled water. Chlorine and fluoride will interfere with the bacterial process.
***If you don’t have a grape leaf you can use an oak, raspberry or blackberry leaf or any other leaf that contains tannins. Tannin helps keep your cucumbers crisp. It’s not necessary for fermentation, but makes for a better final product.
****You will most likely see bubbles after about 24 hours. They may increase for a time and then subside. The cucumbers will turn a dull, army type green and the brine will become cloudy. These are all signs of lacto-fermentation. They will also start to smell more sour/vinegary and like pickles!
Interested in learning more? Join a live online workshop. LEARN MORE HERE
Shy? Purchase the replay and skip the live online workshop. PURCHASE REPLAY HERE
Broke? Let me know if you’d like to attend a workshop and can’t afford it. We’ll work something out. Email me at greenerpostures@pm.me


Above photos show pickles on day one (left) and on day 3 (right). Duller green, cloudy brine and bubbles means fermentation is in process.
More About the Fermentation for Food Preservation Online Workshop:
For a full list of equipment I recommend at my workshops CLICK HERE

Leave a comment